3. Recipes
This section introduces a variety of “recipes”: small scripts that demonstrate how to achieve something using the picraft library. Suggestions for new recipes are gratefully received: please e-mail the author!
3.1. Player Position
The player’s position can be easily queried with the
pos attribute. The value is a
Vector. For example, on the command line:
>>> world = World()
>>> world.player.pos
Vector(x=2.3, y=1.1, z=-0.81)
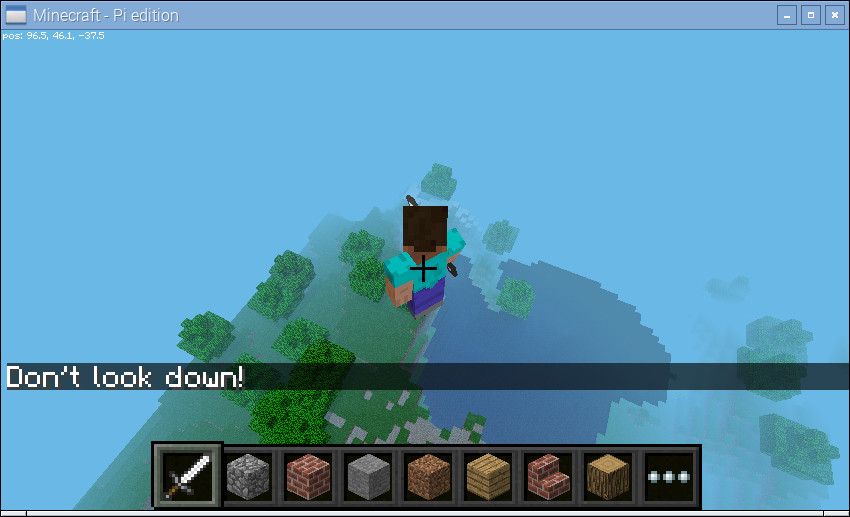
Teleporting the player is as simple as assigning a new vector to the player position. Here we teleport the player into the air by adding 50 to the Y-axis of the player’s current position (remember that in the Minecraft world, the Y-axis goes up/down):
>>> world.player.pos = world.player.pos + Vector(y=50)
Or we can use a bit of Python short-hand for this:
>>> world.player.pos += Vector(y=50)
If you want the player position to the nearest block use the
tile_pos instead:
>>> world.player.tile_pos
Vector(x=2, y=1, z=-1)
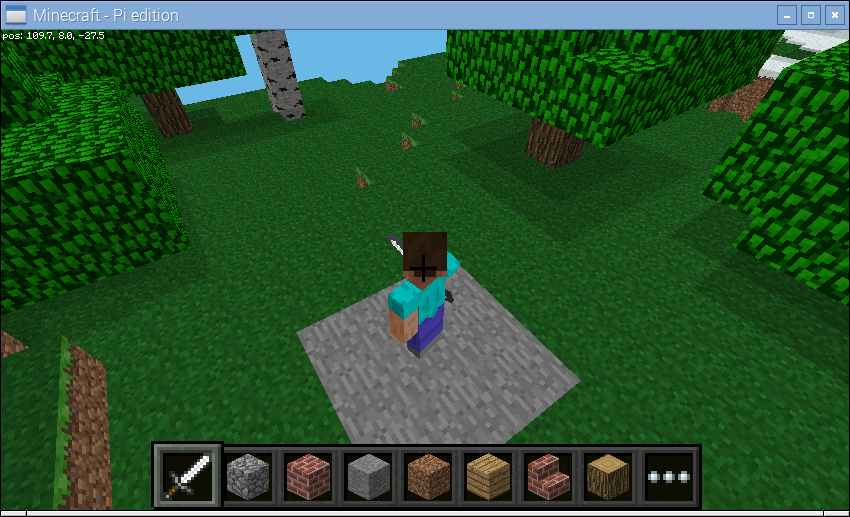
3.2. Changing the World
The state of blocks in the world can be queried and changed by reading and
writing to the blocks attribute. This is indexed
with a Vector (or slice of vectors) and returns or
accepts a Block instance. For example, on the command
line we can find out the type of block we’re standing on like so:
>>> world = World()
>>> p = world.player.tile_pos
>>> world.blocks[p - Y]
<Block "dirt" id=3 data=0>
We can modify the block we’re standing on by assigning a new block type to it:
>>> world.blocks[p - Y] = Block('stone')
We can modify several blocks surrounding the one we’re standing on by assigning
to a slice of blocks. Remember that Python slices are half-open so the
easiest way to specify the slice is to specify the start and the end
inclusively and then simply add one to the end. Here we’ll change p to
represent the vector of the block beneath our feet, then set it and all
immediately surrounding blocks to stone:
>>> p -= Y
>>> world.blocks[p - (X + Z):p + (X + Z) + 1] = Block('stone')
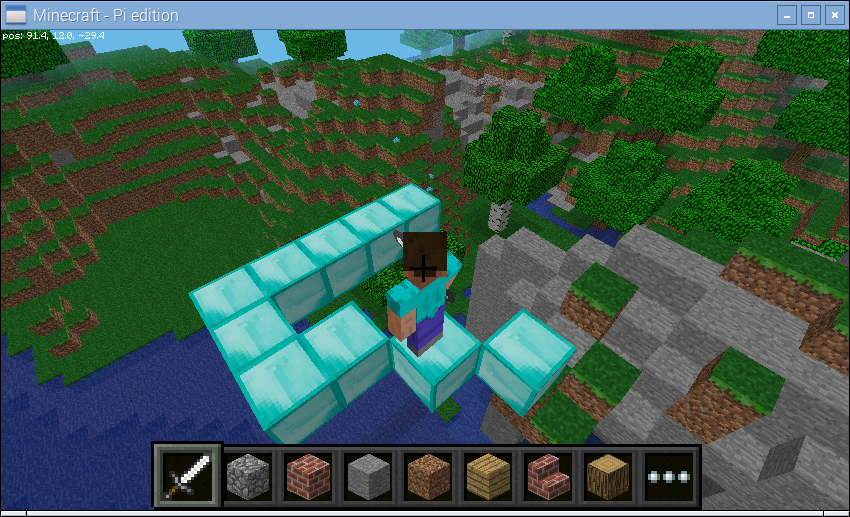
3.3. Auto Bridge
This recipe (and several others in this chapter) was shamelessly stolen from Martin O’Hanlon’s excellent site which includes lots of recipes (although at the time of writing they’re all for the mcpi API). In this case the original script can be found in Martin’s auto-bridge project.
The script tracks the position and likely future position of the player as they walk through the world. If the script detects the player is about to walk onto air it changes the block to diamond:
from __future__ import unicode_literals

import time
from picraft import World, Vector, Block, Y

world = World()
last_pos = None
while True:
    this_pos = world.player.pos
    if last_pos is not None:
        # Has the player moved more than 0.1 units in a horizontal direction?
        movement = (this_pos - last_pos).replace(y=0.0)
        if movement.magnitude > 0.1:
            # Find the next tile they're going to step on
            next_pos = (this_pos + movement.unit).floor() - Y
            world.blocks[next_pos] = Block('diamond_block')
    last_pos = this_pos
    time.sleep(0.01)
Nice, but we can do better. The following script enhances the recipe so that only blocks which are air are changed to diamond, and the bridge “cleans up” after itself:
from __future__ import unicode_literals

import time
from picraft import World, Vector, Block, Y

world = World()
world.say('Auto-bridge active')
try:
    bridge = []
    last_pos = None
    while True:
        this_pos = world.player.pos
        if last_pos is not None:
            # Has the player moved more than 0.1 units in a horizontal direction?
            movement = (this_pos - last_pos).replace(y=0.0)
            if movement.magnitude > 0.1:
                # Find the next tile they're going to step on
                next_pos = (this_pos + movement.unit).floor() - Y
                if world.blocks[next_pos] == Block('air'):
                    with world.connection.batch_start():
                        bridge.append(next_pos)
                        world.blocks[next_pos] = Block('diamond_block')
                        while len(bridge) > 10:
                            world.blocks[bridge.pop(0)] = Block('air')
        last_pos = this_pos
        time.sleep(0.01)
except KeyboardInterrupt:
    world.say('Auto-bridge deactivated')
    with world.connection.batch_start():
        while bridge:
            world.blocks[bridge.pop(0)] = Block('air')
The script uses a list to keep track of the blocks which are present in the bridge, popping off old blocks when the bridge has more than 10 blocks in it. This list is also used to “clean up” the bridge when the script exits.
3.4. Events
The auto-bridge recipe above demonstrates a form of reacting to changes, in that case player position changing.
However, the picraft library provides two different ways of working with
events; you can select whichever one suits your particular application. The
basic way of reacting to events is to periodically “poll” Minecraft for them
(with the poll() method). This will return a list
of all events that occurred since the last time your script polled the server.
For example, the following script prints a message to the console when you hit
a block, detailing the block’s coordinates and the face that you hit:
from time import sleep
from picraft import World

world = World()

while True:
    for event in world.events.poll():
        world.say('Player %d hit face %s of block at %d,%d,%d' % (
            event.player.player_id, event.face,
            event.pos.x, event.pos.y, event.pos.z))
    sleep(0.1)
This is similar to the method used by the official mcpi library. It’s fine for
simple scripts but you can probably see how more complex scripts that check
exactly which block has been hit start to involve long series of if
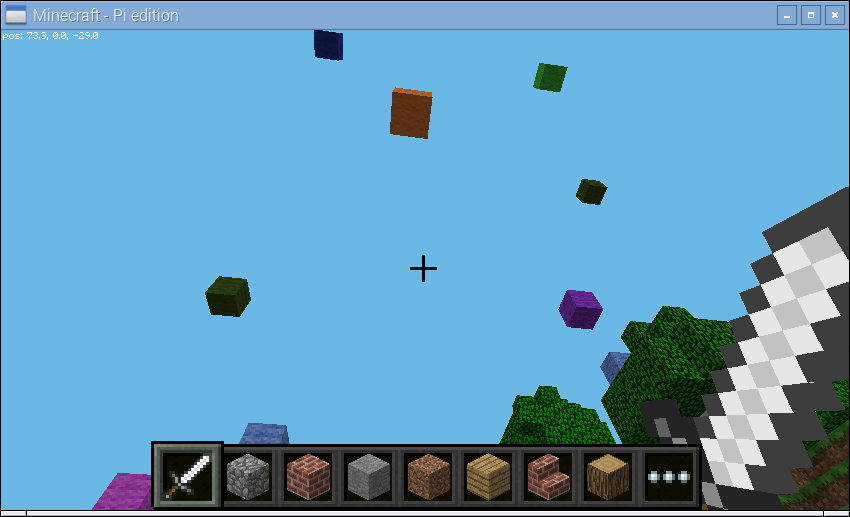
statements which look a bit ugly in code. The following script creates a couple
of blocks near the player on startup: a black block (which ends the script when
hit), and a white block (which makes multi-colored blocks fall from the sky):
from random import randint
from time import sleep
from picraft import World, X, Y, Z, Vector, Block

world = World()

p = world.player.tile_pos
white_pos = p - 2 * X
black_pos = p - 3 * X

world.blocks[white_pos] = Block('#ffffff')
world.blocks[black_pos] = Block('#000000')

running = True
while running:
    for event in world.events.poll():
        if event.pos == white_pos:
            rain = Vector(p.x + randint(-10, 10), p.y + 20, p.z + randint(-10, 10))
            rain_end = world.height[rain]
            world.blocks[rain] = Block('wool', randint(1, 15))
            while rain != rain_end:
                with world.connection.batch_start():
                    world.blocks[rain] = Block('air')
                    rain -= Y
                    world.blocks[rain] = Block('wool', randint(1, 15))
                    sleep(0.1)
        elif event.pos == black_pos:
            running = False
The alternate method of event handling in picraft is to rely on picraft’s
built-in event loop. This involves “tagging” functions which will react to
block hits with the on_block_hit() decorator, then
running the main_loop() method. This causes
picraft to continually poll the server and call the tagged functions when their
criteria are matched by a block-hit event:
from random import randint
from time import sleep
from picraft import World, X, Y, Z, Vector, Block

world = World()

p = world.player.tile_pos
white_pos = p - 2 * X
black_pos = p - 3 * X

world.blocks[white_pos] = Block('#ffffff')
world.blocks[black_pos] = Block('#000000')

@world.events.on_block_hit(pos=black_pos)
def stop_script(event):
    world.connection.close()

@world.events.on_block_hit(pos=white_pos)
def make_it_rain(event):
    rain = Vector(p.x + randint(-10, 10), p.y + 20, p.z + randint(-10, 10))
    rain_end = world.height[rain]
    world.blocks[rain] = Block('wool', randint(1, 15))
    while rain != rain_end:
        with world.connection.batch_start():
            world.blocks[rain] = Block('air')
            rain -= Y
            world.blocks[rain] = Block('wool', randint(1, 15))
            sleep(0.1)

world.events.main_loop()
One advantage of this method (other than slightly cleaner code) is that event handlers can easily be made multi-threaded (to run in parallel with each other) simply by modifying the decorator used:
from random import randint
from time import sleep
from picraft import World, X, Y, Z, Vector, Block

world = World()

p = world.player.tile_pos
white_pos = p - 2 * X
black_pos = p - 3 * X

world.blocks[white_pos] = Block('#ffffff')
world.blocks[black_pos] = Block('#000000')

@world.events.on_block_hit(pos=black_pos)
def stop_script(event):
    world.connection.close()

@world.events.on_block_hit(pos=white_pos, thread=True)
def make_it_rain(event):
    rain = Vector(p.x + randint(-10, 10), p.y + 20, p.z + randint(-10, 10))
    rain_end = world.height[rain]
    world.blocks[rain] = Block('wool', randint(1, 15))
    while rain != rain_end:
        with world.connection.batch_start():
            world.blocks[rain] = Block('air')
            rain -= Y
            world.blocks[rain] = Block('wool', randint(1, 15))
            sleep(0.1)

world.events.main_loop()
Now you should find that the rain all falls simultaneously (more or less, given the constraints of the Pi’s bandwidth!) when you hit the white block multiple times.
You should also be aware that the picraft library supports a larger range of
events than mcpi. Specifically, it has events for player position changes, and
“idle” events. See track_players and
include_idle respectively.
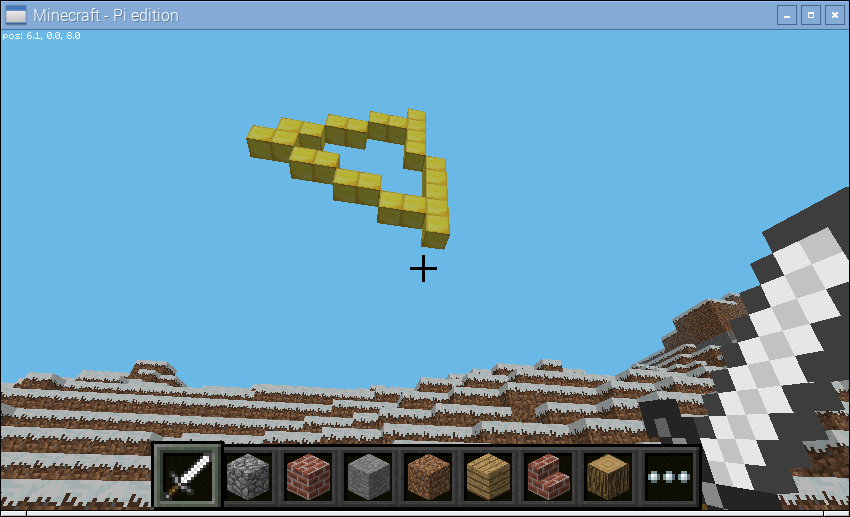
3.5. Shapes
This recipe demonstrates drawing shapes with blocks in the Minecraft world. The picraft library includes a couple of rudimentary routines for calculating the points necessary for drawing lines:
line()which can be used to calculate the positions along a single linelines()which calculates the positions along a series of lines
Here we will attempt to construct a script which draws each regular polygon from an equilateral triangle up to a regular octagon. First we start by defining a function which will generate the points of a regular polygon. This is relatively simple: the interior angles of a polygon always add up to 180 degrees so the angle to turn each time is 180 divided by the number of sides. Given an origin and a side-length it’s a simple matter to iterate over each side generating the necessary point:
from __future__ import division

import math
from picraft import World, Vector, O, X, Y, Z, lines

def polygon(sides, center=O, radius=5):
    angle = 2 * math.pi / sides
    for side in range(sides):
        yield Vector(
                center.x + radius * math.cos(side * angle),
                center.y + radius * math.sin(side * angle))

print(list(polygon(3, center=3*Y)))
print(list(polygon(4, center=3*Y)))
print(list(polygon(5, center=3*Y)))
Next we need a function which will iterate over the number of sides for each
required polygon, using the lines() function to generate
the points required to draw the shape. Then it’s a simple matter to draw each
polygon in turn, wiping it before displaying the next one:
from __future__ import division

import math
from time import sleep
from picraft import World, Vector, Block, O, X, Y, Z, lines

def polygon(sides, center=O, radius=5):
    angle = 2 * math.pi / sides
    for side in range(sides):
        yield Vector(
                center.x + radius * math.cos(side * angle),
                center.y + radius * math.sin(side * angle),
                center.z).round()

def shapes(center=O):
    for sides in range(3, 9):
        yield lines(polygon(sides, center=center))

w = World()
for shape in shapes(w.player.tile_pos + 15*Y + 10*Z):
    # Copy the generator into a list so we can re-use
    # the coordinates
    shape = list(shape)
    # Draw the shape
    with w.connection.batch_start():
        for p in shape:
            w.blocks[p] = Block('gold_block')
    sleep(0.5)
    # Wipe the shape
    with w.connection.batch_start():
        for p in shape:
            w.blocks[p] = Block('air')
3.6. Models
This recipe demonstrates drawing models defined by object files. This is a
venerable file format from Alias|Wavefront. It’s a simple text-based format
that defines the vertices, faces, and other aspects of a model, including the
materials of the model. The picraft library includes a rudimentary parser and
renderer for this format (in the Model class) which
can be used to render such models as blocks in the Minecraft world.
Below is an example object file, which defines the walls and ceiling of a house.
# This is an object file describing a house. First we define the
# required vertices with the "v" command, then reference these
# from faces (with the "f" command). Negative indices in the "f"
# command count back from the most recently defined vertices.

usemtl brick_block

g front-wall
v 0 0 0
v 8 0 0
v 8 3 0
v 0 3 0
v 3 0 0
v 5 0 0
v 3 2 0
v 5 2 0
f -8 -4 -2 -1 -3 -7 -6 -5

g back-wall
v 0 0 8
v 8 0 8
v 8 3 8
v 0 3 8
f -1 -2 -3 -4

g left-wall
f -12 -4 -1 -9

g right-wall
f -11 -3 -2 -10

g ceiling
f -10 -9 -1 -2
We can render this model with the following simple code:
from picraft import Model, World, X, Y, Z

with World() as w:
    p = w.player.tile_pos - 3*X + 5*Z
    with w.connection.batch_start():
        for v, b in Model('house.obj').render().items():
            w.blocks[v + p] = b

By default, the picraft renderer assumes that the material names are Minecraft
block types (see Block.NAMES). However, this is frequently not the
case, requiring you to “map” the material names to block types yourself. A
materials map can be as simple as a dict mapping material names to
Block instances. For example:
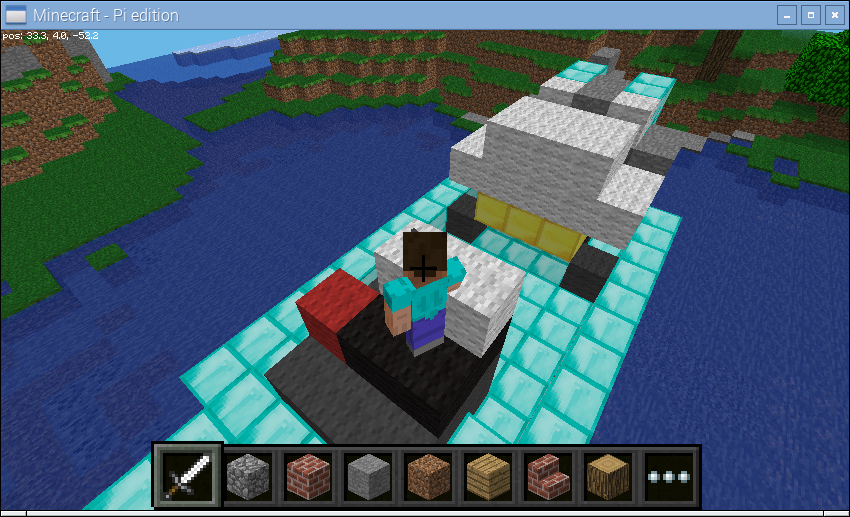
from picraft import World, Model, Block

print('Loading model airboat.obj')
m = Model('airboat.obj')
print('Model has the following materials:')
print('\n'.join(s or '<None>' for s in m.materials))

materials_map = {
    None:       Block('stone'),
    'bluteal':  Block('diamond_block'),
    'bronze':   Block('gold_block'),
    'dkdkgrey': Block('#404040'),
    'dkteal':   Block('#000080'),
    'red':      Block('#ff0000'),
    'silver':   Block('#ffffff'),
    'black':    Block('#000000'),
    }

with World() as w:
    with w.connection.batch_start():
        for v, b in m.render(materials=materials_map).items():
            w.blocks[v] = b
To find out what materials are defined on a model, you can query the
materials attribute. Note that some faces may
have no material associated with them, in which case their material is listed
as None (not the blank string).
A materials map may also be a function. This will be called with the face being
rendered and must return a Block instance or None
(if you don’t want that particular face to be rendered). This is useful for
quickly previewing a shape without performing any material mapping; simply
provide a function which always returns the same block type:
from picraft import World, Model, Block

m = Model('shuttle.obj').render(materials=lambda face: Block('stone'))

with World() as w:
    with w.connection.batch_start():
        for v, b in m.items():
            w.blocks[v + 20*Y] = b
3.7. Animation
This recipe demonstrates, in a series of steps, the construction of a
simplistic animation system in Minecraft. Our aim is to create a simple stone
cube which rotates about the X axis somewhere in the air. Our first script uses
vector_range() to obtain the coordinates of all blocks
within the cube, then uses the rotate() method to
rotate them about the X axis:
from __future__ import division

from time import sleep
from picraft import World, Vector, X, Y, Z, vector_range, Block

world = World()
world.checkpoint.save()
try:
    cube_range = vector_range(Vector() - 2, Vector() + 2 + 1)
    # Draw frame 1
    state = {}
    for v in cube_range:
        state[v + (5 * Y)] = Block('stone')
    with world.connection.batch_start():
        for v, b in state.items():
            world.blocks[v] = b
    sleep(0.2)
    # Wipe frame 1
    with world.connection.batch_start():
        for v in state:
            world.blocks[v] = Block('air')
    # Draw frame 2
    state = {}
    for v in cube_range:
        state[v.rotate(15, about=X).round() + (5 * Y)] = Block('stone')
    with world.connection.batch_start():
        for v, b in state.items():
            world.blocks[v] = b
    sleep(0.2)
    # and so on...
finally:
    world.checkpoint.restore()
As you can see in the script above we draw the first frame, wait for a bit, then wipe the frame by setting all coordinates in that frame’s state back to “air”. Then we draw the second frame and wait for a bit.
Although this approach works, it’s obviously very long winded for lots of
frames. What we want to do is calculate the state of each frame in a function.
This next version demonstrates this approach; we use a generator function to
yield the state of each frame in turn so we can iterate over the frames with
a simple for loop.
We represent the state of a frame of our animation as a dict which maps
coordinates (in the form of Vector instances) to
Block instances:
from __future__ import division

from time import sleep
from picraft import World, Vector, X, Y, Z, vector_range, Block


def animation_frames(count):
    cube_range = vector_range(Vector() - 2, Vector() + 2 + 1)
    for frame in range(count):
        state = {}
        for v in cube_range:
            state[v.rotate(15 * frame, about=X).round() + (5 * Y)] = Block('stone')
        yield state


world = World()
world.checkpoint.save()
try:
    for frame in animation_frames(10):
        # Draw frame
        with world.connection.batch_start():
            for v, b in frame.items():
                world.blocks[v] = b
        sleep(0.2)
        # Wipe frame
        with world.connection.batch_start():
            for v, b in frame.items():
                world.blocks[v] = Block('air')
finally:
    world.checkpoint.restore()
That’s more like it, but the updates aren’t terribly fast despite using the batch functionality. In order to improve this we should only update those blocks which have actually changed between each frame. Thankfully, because we’re storing the state of each as a dict, this is quite easy:
from __future__ import division

from time import sleep
from picraft import World, Vector, X, Y, Z, vector_range, Block


def animation_frames(count):
    cube_range = vector_range(Vector() - 2, Vector() + 2 + 1)
    for frame in range(count):
        yield {
            v.rotate(15 * frame, about=X).round() + (5 * Y): Block('stone')
            for v in cube_range}


def track_changes(states, default=Block('air')):
    old_state = None
    for state in states:
        # Assume the initial state of the blocks is the default ('air')
        if old_state is None:
            old_state = {v: default for v in state}
        # Build a dict of those blocks which changed from old_state to state
        changes = {v: b for v, b in state.items() if old_state.get(v) != b}
        # Blank out blocks which were in old_state but aren't in state
        changes.update({v: default for v in old_state if v not in state})
        yield changes
        old_state = state


world = World()
world.checkpoint.save()
try:
    for state in track_changes(animation_frames(20)):
        with world.connection.batch_start():
            for v, b in state.items():
                world.blocks[v] = b
        sleep(0.2)
finally:
    world.checkpoint.restore()
Note: this still isn’t perfect. Ideally, we would identify contiguous blocks of coordinates to be updated which have the same block and set them all at the same time (which will utilize the world.setBlocks call for efficiency). However, this is relatively complex to do well so I shall leave it as an exercise for you, dear reader!
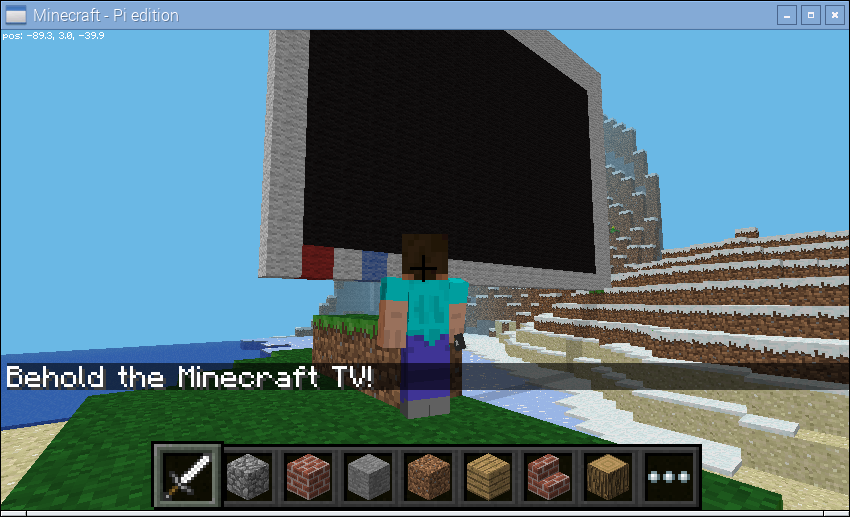
3.8. Minecraft TV
If you’ve got a Raspberry Pi camera module, you can build a TV to view a live feed from the camera in the Minecraft world. Firstly we need to construct a class which will accept JPEGs from the camera’s MJPEG stream, and render them as blocks in the Minecraft world. Then we need a class to construct the TV model itself and enable interaction with it:
from __future__ import division

import io
import time
import picamera
from picraft import World, V, X, Y, Z, Block
from PIL import Image


def track_changes(old_state, new_state, default=Block('#000000')):
    changes = {v: b for v, b in new_state.items() if old_state.get(v) != b}
    changes.update({v: default for v in old_state if not v in new_state})
    return changes


class MinecraftTVScreen(object):
    def __init__(self, world, origin, size):
        self.world = world
        self.origin = origin
        self.size = size
        self.jpeg = None
        self.state = {}
        # Construct a palette for PIL
        self.palette = list(Block.COLORS)
        self.palette_img = Image.new('P', (1, 1))
        self.palette_img.putpalette(
            [c for rgb in self.palette for c in rgb] +
            list(self.palette[0]) * (256 - len(self.palette))
            )

    def write(self, buf):
        if buf.startswith(b'\xff\xd8'):
            if self.jpeg:
                self.jpeg.seek(0)
                self.render(self.jpeg)
            self.jpeg = io.BytesIO()
        self.jpeg.write(buf)

    def close(self):
        self.jpeg = None

    def render(self, jpeg):
        o = self.origin
        img = Image.open(jpeg)
        img = img.resize(self.size, Image.BILINEAR)
        img = img.quantize(len(self.palette), palette=self.palette_img)
        new_state = {
            o + V(0, y, x): Block.from_color(self.palette[img.getpixel((x, y))], exact=True)
            for x in range(img.size[0])
            for y in range(img.size[1])
            }
        with self.world.connection.batch_start():
            for v, b in track_changes(self.state, new_state).items():
                self.world.blocks[v] = b
        self.state = new_state


class MinecraftTV(object):
    def __init__(self, world, origin=V(), size=(12, 8)):
        self.world = world
        self.camera = picamera.PiCamera()
        self.camera.resolution = (64, int(64 / size[0] * size[1]))
        self.camera.framerate = 5
        self.origin = origin
        self.size = V(0, size[1], size[0])
        self.button_pos = None
        self.quit_pos = None
        self.screen = MinecraftTVScreen(
            self.world, origin + V(0, 1, 1), (size[0] - 2, size[1] - 2))

    def main_loop(self):
        try:
            self.create_tv()
            running = True
            while running:
                for event in self.world.events.poll():
                    if event.pos == self.button_pos:
                        if self.camera.recording:
                            self.switch_off()
                        else:
                            self.switch_on()
                    elif event.pos == self.quit_pos:
                        running = False
                time.sleep(0.1)
        finally:
            if self.camera.recording:
                self.switch_off()
            self.destroy_tv()

    def create_tv(self):
        o = self.origin
        self.world.blocks[o:o + self.size + 1] = Block('#ffffff')
        self.world.blocks[
            o + V(0, 1, 1):o + self.size - V(0, 2, 2) + 1] = Block('#000000')
        self.button_pos = o + V(z=3)
        self.quit_pos = o + V(z=1)
        self.world.blocks[self.button_pos] = Block('#0080ff')
        self.world.blocks[self.quit_pos] = Block('#800000')
        self.world.say('Behold the Minecraft TV!')

    def destroy_tv(self):
        o = self.origin
        self.world.blocks[o:o + self.size + 1] = Block('air')

    def switch_on(self):
        self.world.say('Switching TV on')
        self.camera.start_recording(self.screen, format='mjpeg')

    def switch_off(self):
        self.world.say('Switching TV off')
        self.camera.stop_recording()
        o = self.origin
        self.world.blocks[
            o + V(0, 1, 1):o + self.size - V(0, 2, 2) + 1] = Block('#000000')


with World() as world:
    p = world.player.tile_pos
    tv = MinecraftTV(world, origin=p + 8*X + 2*Y, size=(20, 14))
    tv.main_loop()
Don’t expect to be able to recognize much in the Minecraft TV; the resolution is extremely low and the color matching is far from perfect. Still, if you point the camera at obvious blocks of primary colors and move it around slowly you should see a similar result on the in-game display.
The script includes the ability to position and size the TV as you like, and you may like to experiment with adding new controls to it!